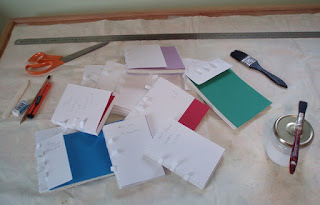
I thought it was time to take a few photos so you could see what I'm up to. Having made the signatures (sets of paper) and organised them into books, I marked them along the spine for the stitching. To do this I put the pages between 2 pieces of board and measured the spaces between the stitches, then used a fine hacksaw to make small cuts across the top of the spine. I had to make sure everything was perfectly level otherwise I could end up with different sized holes. Please note the excellent book press/vice Bob masterminded from a pine shelf, 2 brackets and 4 bolts and wingnuts.
Having prepared all the books it was time to start stitching using the cousoir I bought from Michel. A continuous length of tape was spread up and down between the top bar and the slot at the bottom, held in place with pins at the top and large needles at the bottom underneath the base. The tapes were then carefully positioned to line up with the marks on the paper. Then with a long linen thread and a needle I started sewing doing one signature at a time and knotting each subsequent one to the previous till the book was complete. The next step was to carefully pull the tape out till just enough was left to hold it all together, see the stack on the right, and trim the ends.
With all the books stitched I started on the glueing. This helps to avoid ugly gaps between the pages when you use the book. I glued the spines and pressed the glue into the paper using the bookbinder's bone, then when they were dry I shaped a round spine by tapping with a hammer and pressing along the spine at the edge of the fold with the bone. That's it for now, I'll be getting on with the next phase over the weekend.
Here are a couple more autumn pics from the nature journal.
These pink flowers are called Femmes Nus (naked ladies) here as they bloom before the leaves grow.


No comments:
Post a Comment