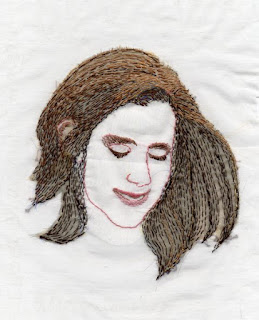
At last I have completed the stitched picture of my niece Esther. She is an enigmatic soul with a big heart and I wanted to capture that spirit in this portrait.
I clipped this picture from a recent photo to use as the basis.
The first step is to print out the photo to the required size which I then tape to my led light box.
I lay a piece of cotton organdie on top and draw the outline in erasable gel pen that disappears when I iron the finished piece.
The next step is to choose the background fabric and the colours I want to use for the stitching.
I found this lovely colourful batik in my collection and some pieces of bronze and blue organza to use to give depth to her hair.
Here is the portrait after the initial stitching has been completed. I've used running stitch for the hair in different shades of brown, backstitch for the outline and satin stitch for her lips.
The next step is to interface the face area with some iron on interfacing, I use a very fine woven cotton one as it works well with the cotton organdie.
I use the light box again to trace Esther's name and birthday along the sides and mark where the boundary of the portrait will be.
Now the fun starts, I pin and tack the portrait to the background and start the decoration by stitching through both layers following the patterns on the background. Then I made a line of running stitch on the boundary which I whipped with a contrasting thread.
Finally I carefully trimmed away the excess organdie and then I decided to re-stitch the script in a stronger colour as the pale colour didn't stand out enough.
I've used this method on several of my family portraits now and soon they will all be assembled into a wall hanging to celebrate the centenary of my mother's birth next year.


No comments:
Post a Comment